

Best picks
Best Routers for Starlink
Picks, Ethernet and Bypass by Kit
Find the best router for your Starlink kit: compare RS300, ASUS and eero, check Ethernet adapters and retained power equipment, then choose bypass or AP mode.
By thisPING EditorialUpdated November 3, 20268 min read
On this page · Match your Starlink kit before buying
For a single indoor router, our starting pick is the Netgear Nighthawk RS300: tri-band Wi-Fi 7 and four LAN ports make a practical home-network upgrade. Choose the ASUS RT-BE92U for more multi-gig wired flexibility, or eero Pro 7 for mesh expansion across rooms. Keep the supplied Starlink router if it already does the job; first identify your kit, because the required Ethernet and power connections differ.
Match your Starlink kit before buying
Read the kit name and identify the router separately. Starlink Mini is the dish with integrated Wi-Fi; Router Mini is a separate indoor router. Starlink's Standard 4 guide distinguishes Standard 4 with Router Mini from Standard 4 X with Router 3.
The following paths are for making your new unit the routing gateway. Keep the original dish-power equipment connected.
Standard Actuated with Gen 2 router
- Ethernet path to your new router's WAN
- Starlink Ethernet Adapter → new WAN
- Keep connected
- Gen 2 router, dish cable and AC power
- Bypass / extra part
- Buy the adapter; bypass Gen 2
Standard 4 X / Standard with Router 3
- Ethernet path to your new router's WAN
- LAN port under Router 3's rear cover → new WAN
- Keep connected
- Router 3, its power supply and dish cable
- Bypass / extra part
- Bypass Router 3; no Gen 2 adapter
Standard 4 with Router Mini
- Ethernet path to your new router's WAN
- Free Router Mini Ethernet port → new WAN
- Keep connected
- Router Mini, Dual PoE supply and kit cables
- Bypass / extra part
- Bypass Router Mini; no Gen 2 adapter
Starlink Mini
- Ethernet path to your new router's WAN
- Mini RJ45 port → new WAN
- Keep connected
- Mini and its power supply/cable
- Bypass / extra part
- Bypass integrated Wi-Fi; official Mini Ethernet cable for the seal
Standard Circular with Gen 1 router
- Ethernet path to your new router's WAN
- Replace Gen 1 router at its power supply → new WAN
- Keep connected
- Original Starlink power supply and dish connection
- Bypass / extra part
- Direct replacement; no bypass or Gen 2 adapter
Enterprise / Performance Gen 1, Gen 2 or Gen 3 with included power supply
- Ethernet path to your new router's WAN
- Included Starlink Ethernet cable from power supply → new WAN
- Keep connected
- Exact kit's power supply and dish cable
- Bypass / extra part
- Direct replacement; no Starlink-router bypass
Full comparison table
Swipe to compare. Row labels stay visible.
| Exact Starlink equipment | Ethernet path to your new router's WAN | Keep connected | Bypass / extra part |
|---|---|---|---|
| Standard Actuated with Gen 2 router | Starlink Ethernet Adapter → new WAN | Gen 2 router, dish cable and AC power | Buy the adapter; bypass Gen 2 |
| Standard 4 X / Standard with Router 3 | LAN port under Router 3's rear cover → new WAN | Router 3, its power supply and dish cable | Bypass Router 3; no Gen 2 adapter |
| Standard 4 with Router Mini | Free Router Mini Ethernet port → new WAN | Router Mini, Dual PoE supply and kit cables | Bypass Router Mini; no Gen 2 adapter |
| Starlink Mini | Mini RJ45 port → new WAN | Mini and its power supply/cable | Bypass integrated Wi-Fi; official Mini Ethernet cable for the seal |
| Standard Circular with Gen 1 router | Replace Gen 1 router at its power supply → new WAN | Original Starlink power supply and dish connection | Direct replacement; no bypass or Gen 2 adapter |
| Enterprise / Performance Gen 1, Gen 2 or Gen 3 with included power supply | Included Starlink Ethernet cable from power supply → new WAN | Exact kit's power supply and dish cable | Direct replacement; no Starlink-router bypass |
Scroll horizontally to see every column
| Exact Starlink equipment | Ethernet path to your new router's WAN | Keep connected | Bypass / extra part |
|---|---|---|---|
| Standard Actuated with Gen 2 router | Starlink Ethernet Adapter → new WAN | Gen 2 router, dish cable and AC power | Buy the adapter; bypass Gen 2 |
| Standard 4 X / Standard with Router 3 | LAN port under Router 3's rear cover → new WAN | Router 3, its power supply and dish cable | Bypass Router 3; no Gen 2 adapter |
| Standard 4 with Router Mini | Free Router Mini Ethernet port → new WAN | Router Mini, Dual PoE supply and kit cables | Bypass Router Mini; no Gen 2 adapter |
| Starlink Mini | Mini RJ45 port → new WAN | Mini and its power supply/cable | Bypass integrated Wi-Fi; official Mini Ethernet cable for the seal |
| Standard Circular with Gen 1 router | Replace Gen 1 router at its power supply → new WAN | Original Starlink power supply and dish connection | Direct replacement; no bypass or Gen 2 adapter |
| Enterprise / Performance Gen 1, Gen 2 or Gen 3 with included power supply | Included Starlink Ethernet cable from power supply → new WAN | Exact kit's power supply and dish cable | Direct replacement; no Starlink-router bypass |
Sources: Starlink's third-party-router guidance, LAN-port guide, bypass instructions and the kit guides linked here.
Documentation trap: Starlink's general connection article says Standard has Ethernet on its power supply. Its Standard 4 X setup guide instead connects the dish cable to Router 3. Follow your exact kit's cable layout; the Router 3 path above retains that layout.
For Mini, the setup PDF warns that a standard RJ45 cable removes its IP67 rating. The accessories guide identifies the sealed 15 m Mini Starlink Ethernet Cable separately from the Mini USB-C power cable. Order by function, not just the word “Mini.”
Quick picks: compare the indoor network
These specifications come from Netgear, ASUS and eero. Coverage figures are manufacturer claims, not measured room coverage.
Compare specifications and all conditions
RS300
- Choose it for
- One router; several wired devices
- Wi-Fi
- Tri-band Wi-Fi 7, including 6 GHz
- WAN connection
- 2.5 Gbps
All specifications
- LAN ports left after WAN
- 2 × 2.5 Gbps + 2 × 1 Gbps
- Maker's coverage claim
- Up to 2,500 sq ft
RT-BE92U
- Choose it for
- Wired office/NAS; ASUS mesh plans
- Wi-Fi
- Tri-band Wi-Fi 7, including 6 GHz
- WAN connection
- 10 Gbps WAN/LAN used here
All specifications
- LAN ports left after WAN
- 1 × 2.5 Gbps WAN/LAN + 3 × 2.5 Gbps LAN
- Maker's coverage claim
- Up to 2,750 sq ft
eero Pro 7
- Choose it for
- Rooms needing multiple mesh nodes
- Wi-Fi
- Tri-band Wi-Fi 7, including 6 GHz
- WAN connection
- Either auto-sensing 5 GbE port
All specifications
- LAN ports left after WAN
- 1 × 5 GbE before wired backhaul
- Maker's coverage claim
- Up to 2,000 sq ft per unit; conflict below
Keep Router 3
- Choose it for
- Current coverage is satisfactory
- Wi-Fi
- Wi-Fi 6
- WAN connection
- Retain kit connection
All specifications
- LAN ports left after WAN
- 2 LAN ports
- Maker's coverage claim
- Judge your rooms before spending
Full comparison table
Swipe to compare. Row labels stay visible.
| Pick | Choose it for | Wi-Fi | WAN connection | LAN ports left after WAN | Maker's coverage claim |
|---|---|---|---|---|---|
| RS300 | One router; several wired devices | Tri-band Wi-Fi 7, including 6 GHz | 2.5 Gbps | 2 × 2.5 Gbps + 2 × 1 Gbps | Up to 2,500 sq ft |
| RT-BE92U | Wired office/NAS; ASUS mesh plans | Tri-band Wi-Fi 7, including 6 GHz | 10 Gbps WAN/LAN used here | 1 × 2.5 Gbps WAN/LAN + 3 × 2.5 Gbps LAN | Up to 2,750 sq ft |
| eero Pro 7 | Rooms needing multiple mesh nodes | Tri-band Wi-Fi 7, including 6 GHz | Either auto-sensing 5 GbE port | 1 × 5 GbE before wired backhaul | Up to 2,000 sq ft per unit; conflict below |
| Keep Router 3 | Current coverage is satisfactory | Wi-Fi 6 | Retain kit connection | 2 LAN ports | Judge your rooms before spending |
Scroll horizontally to see every column
| Pick | Choose it for | Wi-Fi | WAN connection | LAN ports left after WAN | Maker's coverage claim |
|---|---|---|---|---|---|
| RS300 | One router; several wired devices | Tri-band Wi-Fi 7, including 6 GHz | 2.5 Gbps | 2 × 2.5 Gbps + 2 × 1 Gbps | Up to 2,500 sq ft |
| RT-BE92U | Wired office/NAS; ASUS mesh plans | Tri-band Wi-Fi 7, including 6 GHz | 10 Gbps WAN/LAN used here | 1 × 2.5 Gbps WAN/LAN + 3 × 2.5 Gbps LAN | Up to 2,750 sq ft |
| eero Pro 7 | Rooms needing multiple mesh nodes | Tri-band Wi-Fi 7, including 6 GHz | Either auto-sensing 5 GbE port | 1 × 5 GbE before wired backhaul | Up to 2,000 sq ft per unit; conflict below |
| Keep Router 3 | Current coverage is satisfactory | Wi-Fi 6 | Retain kit connection | 2 LAN ports | Judge your rooms before spending |
These Ethernet rates describe ports, not promised Starlink download speeds. Netgear labels its wireless rate a theoretical maximum with lower actual throughput; do not choose by the summed BE class. See modem vs router for the roles of the boxes.
Best single-router starting point: Netgear Nighthawk RS300
Choose the RS300 for a central router and several wired devices. Its technical details specify a 2.5 Gbps internet port, two 2.5 Gbps LAN ports and two gigabit LAN ports. Netgear's coverage claim is up to 2,500 sq ft; walls and construction reduce coverage. Its page also contains a generic “10 Gig” panel: use the model-specific technical block, corroborated by the manual.
Only two LAN ports are multi-gig. Netgear documents AP mode in the RS300 manual, so you can retain Starlink routing. Setup uses the Nighthawk app, and automatic firmware updates are supported. Netgear's EOS policy generally ends support three years after the last sale date, rather than three years after your purchase.
Variant check: buy the full RS300 model. The shared manual also covers RS280 and a model named BE9300; the speed class alone does not identify your router.
Best for a wired home office: ASUS RT-BE92U
Choose ASUS when wired connections and configuration flexibility drive the purchase. Its spec sheet lists one 10 Gbps WAN/LAN, one 2.5 Gbps WAN/LAN and three 2.5 Gbps LAN ports. Using the 10 Gbps port for Starlink leaves four 2.5 Gbps connections for your local network.
ASUS supports router mode, AP mode and AiMesh, with browser and ASUS Router app management. Its product page claims up to 2,750 sq ft and supports wired or wireless AiMesh backhaul. The 5 and 6 GHz radios are 2×2.
Variant check: this pick is the standalone RT-BE92U. Check the complete model and bundle contents before ordering extra mesh equipment. ASUS lists automatic firmware updates; consult its EOL list when reviewing support status.
Best for mesh expansion: eero Pro 7
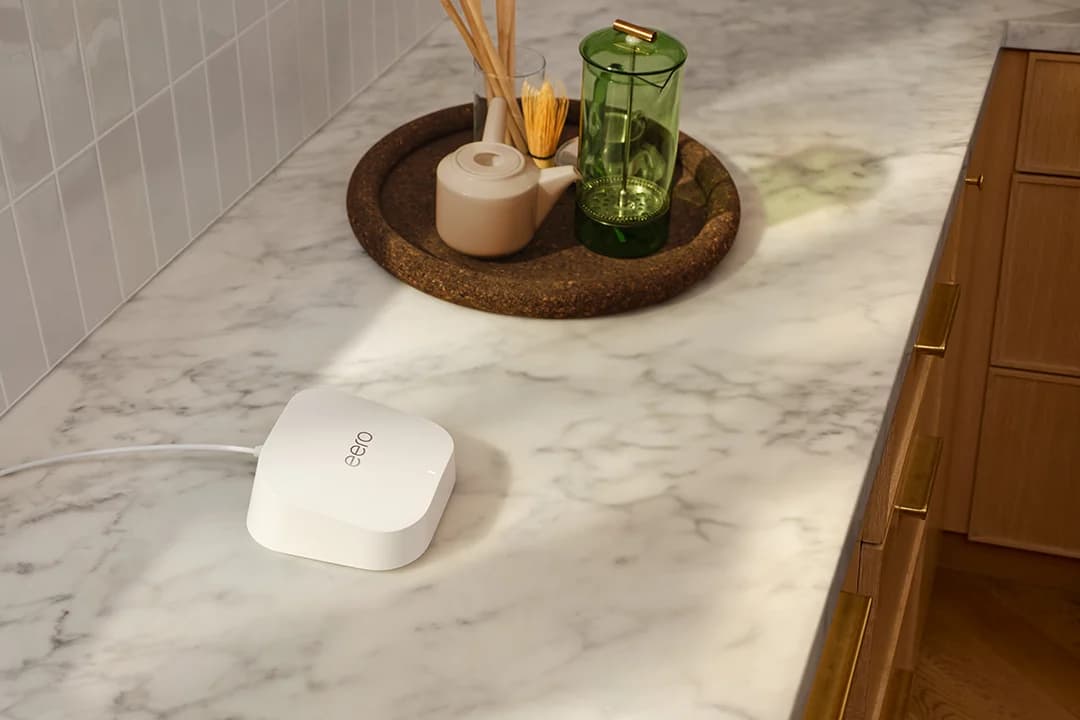
Choose Pro 7 when distributing indoor Wi-Fi across rooms is the objective. Each unit can be the gateway or an indoor extender and has two auto-sensing 5 GbE ports, according to eero support. One unit is still one Wi-Fi location: select the maker's 2-pack or 3-pack when additional nodes are needed. The product card here covers the single unit.
Coverage discrepancy: eero's shop and support prose say 2,000 sq ft per unit, while the same support article's hardware table says 2,500 sq ft. Use the lower claim for preliminary planning and verify room coverage after installation. We do not infer a pack's usable coverage by multiplying those figures.
Allow for a switch: WAN uses one gateway port; wired backhaul can consume the other. eero instructs you to put the switch after the gateway eero, with additional eeros downstream, including in bridge mode. Connecting a computer to a wireless node still sends its upstream traffic over Wi-Fi. eero's wiring guidance explains both limits.
Setup and management require the eero phone app. Its security policy promises Pro 7 updates at least through October 31, 2031, or five years after qualifying new purchases directly from eero or Amazon if later. Keep eero 7, Pro 7 and Max 7 separate when selecting a pack; our eero comparison explains the alternatives.
Choose bypass or access-point operation
For the new router to manage your network: enable Starlink bypass where the kit matrix requires it; leave the new unit in router mode. Starlink says to set its WAN connection to DHCP / automatic IP.
To keep Starlink managing the network: leave Starlink bypass off and use RS300/ASUS AP mode or eero bridge mode. Bridged eeros retain Wi-Fi but lose some advanced features. On ASUS, AP mode disables NAT and firewall functions by default. Do not bypass Starlink and also disable routing on every downstream unit.
Leaving both indoor routers routing creates double NAT. Choose a deliberate operating mode before troubleshooting games or remote access.
Starlink's mesh compatibility guidance also establishes these boundaries:
- Yes: Third-party router: connect through the kit's Ethernet path
- No: Starlink mesh nodes: cannot join a third-party wireless mesh
- Partly: Keeping Starlink routing: use AP or bridge mode on the added system
Wire it, then verify the rooms
First record performance while the supplied router is still available. Starlink's speed-test instructions distinguish Router to Internet from Device to Router; a lower device-to-router result points to indoor Wi-Fi as the limit. Starlink warns that some app features may not work with third-party equipment, so capture that baseline before bypassing.
Use Cat5e or better for ordinary Ethernet links, following Starlink's troubleshooting guidance; keep the specified Starlink cables on kit-specific connections. For mesh placement and backhaul choices, see best mesh Wi-Fi systems.
Confirm the kit
Match the matrix; keep the dish's original power path and obtain only its required accessory.
Connect the gateway
Run the documented Ethernet output to the new WAN; choose router mode with automatic IP, or AP/bridge behind Starlink routing.
Add wired devices and nodes
Keep switches and additional eeros downstream of the gateway eero.
Verify where you work
Compare a wired connection, Wi-Fi beside the gateway and Wi-Fi in the problem room; keep notes before changing placement.
If only the distant room deteriorates, investigate indoor placement/backhaul. If everything drops together, inspect Starlink's alerts, obstructions and cables before buying another router. Starlink's weather guidance says rain, snow and hail can cause service dropouts; an indoor-router upgrade does not remove that cause.
Complete the parts and power checklist
- Standard Actuated/Gen 2: official Starlink Ethernet Adapter, Ethernet patch lead and retained Gen 2 equipment.
- Mini outdoors: official 15 m Mini Starlink Ethernet Cable for the sealed connection; retain Mini power separately.
- Other kits: the matrix's Ethernet connection, existing dish-power equipment, plus the new router's own power supply.
- Wired mesh: count ports after WAN and backhaul, then add a downstream switch if necessary.
- Winter continuity: inventory every required power supply, switch and remote node before choosing a network UPS. Put essential adapters on battery-backed outlets; APC's manual distinguishes those from surge-only outlets. Size runtime for the complete load; router-only backup leaves the dish's power path uncovered.
How we choose
This is a documentation-based selection using official product pages, manuals, support instructions and published update policies, checked November 2, 2026. We prioritize the exact Starlink connection path, remaining wired ports, operating modes and room-by-room expansion. Coverage figures remain maker claims; recommendations are editorial judgments, with no measured throughput or coverage results. Starlink does not guarantee third-party compatibility. Our selection method explains the approach.
Verdict
Keep the supplied router when coverage is satisfactory. Choose RS300 for a straightforward single-router upgrade, RT-BE92U for wired flexibility or eero Pro 7 for a mesh you can expand. Buy the kit-specific Ethernet part first, preserve the dish-power path and choose which device will handle routing before switching over.
Frequently asked questions
Do I need a new router for Starlink?
Keep the supplied router if coverage and wired connections already meet your needs. Router 3 provides Wi-Fi 6 and two LAN ports; Mini has integrated Wi-Fi. Before buying, use Starlink's Device to Router test to check whether indoor Wi-Fi is limiting performance. A new indoor router cannot clear a dish obstruction or prevent satellite-service weather dropouts.
Does every Starlink kit need an Ethernet adapter?
No. A Gen 2 router with Standard Actuated needs the Starlink Ethernet Adapter. Router 3 has built-in LAN Ethernet, and Mini has an RJ45 port; use Mini's official cable to preserve its weather seal. Enterprise and Performance kits with an included power supply support direct third-party-router connections. Match the full kit and router names before ordering accessories.
Should I enable bypass mode with eero?
Use Starlink bypass when eero will manage routing. Alternatively, leave Starlink routing and put eero in bridge mode after setup. Bridged eeros still provide Wi-Fi, but lose some advanced features and still require traffic to pass through a gateway eero. Starlink bypass disables Starlink Wi-Fi and requires a physical factory reset to reverse.
Will bypass mode fix Starlink port forwarding or gaming NAT?
Bypass removes Starlink's indoor router from routing; it does not change your service's IP policy. Starlink's [default IPv4 policy](https://starlink.com/support/article/1192f3ef-2a17-31d9-261a-a59d215629f4) uses CGNAT and does not allow inbound traffic. A third-party router's port-forwarding menu cannot override that upstream restriction. Check the current IP policy before buying a router specifically for an inbound IPv4 server or remote-access requirement.
Related guides
Best picks · Wi-Fi Routers
Best Routers for AT&T Fiber: Match Your Gateway and Plan
Choose the right router for AT&T Fiber: clear ASUS, Netgear and eero picks, gateway checks, IP Passthrough versus AP mode, and complete wiring examples.
Buying guide · Wi-Fi Routers
Black Friday Router Deals: Mesh and NAS Buying Checklist

Judge Black Friday router, mesh Wi-Fi and NAS offers by exact US model, pack size, spare ports, drive capacity and support with a printable buying worksheet.
Comparison · Wi-Fi Routers
Wi-Fi 7 vs Wi-Fi 6E vs Wi-Fi 6: Should You Replace Your Router?
Compare Wi-Fi 7, 6E and 6 by your actual devices, ports and rooms. Use our household inventory to decide whether to keep, add an adapter or replace your router.